.svg "SpotDevLogoOrange (2)")
A key element of content marketing is publishing content on your own blog, and WordPress allows you to do this remarkably easily. There is no need to call on a web developer to do it for you, and I’m confident that this blog post is all you’ll need to start posting quality content on your blog.
The Posts section
First things first, we need to introduce you to the ‘Posts’ section of a WordPress dashboard, located at the top of the navigation panel on the left hand side: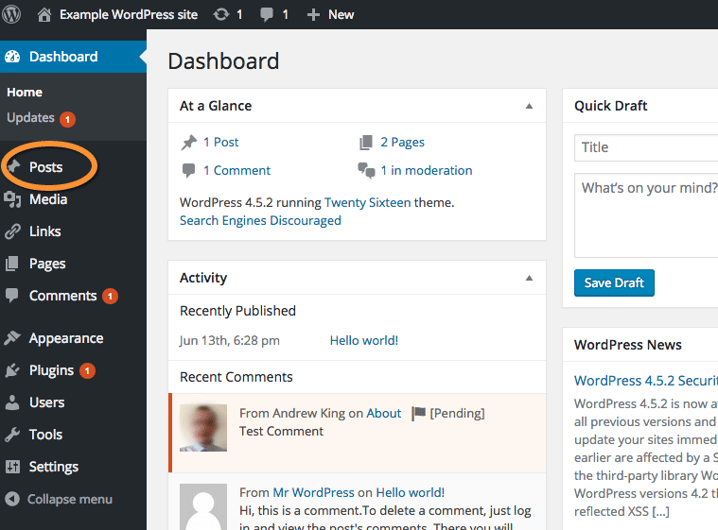
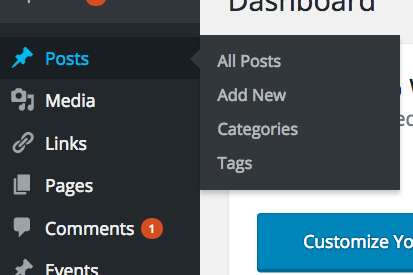
If you hover your mouse over ‘Posts’ a number of options will appear:
Before we jump into adding a new post, let’s take a look at the ‘All Posts’ page.
All Posts
When clicking on ‘All Posts’ you’ll be greeted by a list of every post currently live on the blog. If it’s your first time using WordPress, the only post you will see is titled ‘Hello world!’.
In the example below there are two posts - a published post titled ‘Hello world!’ and the draft of a post titled ‘The Guide to Heading Tags and How to Use Them’.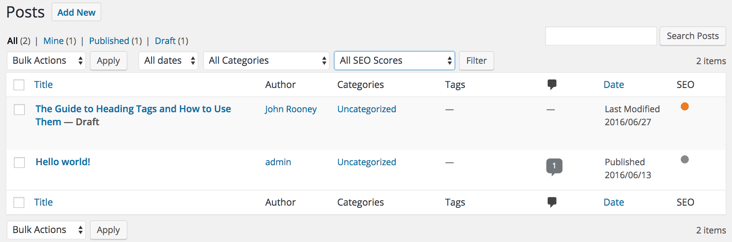
From this screen you can perform a number of actions:
- You can publish a new post by clicking on ‘Add New’.
- If you have previously published a number of blog posts, you can find them using the search bar in the top right hand corner.
- You can sort posts by date (month of publication), category or even SEO Score (‘Bad’, ‘OK’, ‘Good’, ‘No Focus Keyword’ or ‘Post NoIndexed’).
You can also hover over any of the posts in the list, bringing up the following options:

- Edit;
- Quick Edit;
- Trash; and
- Preview.
Clicking on the title also takes you through to the ‘Edit’ screen.
Adding a new post
To add a new post to your WordPress blog you can either click ‘Add New’ from the drop down beneath ‘Posts’ in the left hand navigation column, or from the ‘All Posts’ page.
You will then be taken to this screen:
As you can see from the screenshot, the top line is where your blog post title goes, while the large text box below that is for the main body of your content.
You’ll also see the two dialogue boxes on the right, but we’ll look at those in more detail shortly (there are actually three more boxes below the ‘Publish’ and ‘Format’ boxes).
The Ribbon
The ‘Ribbon’ refers to the row of options that sits above the main text box, and includes many options that will be familiar if you’ve ever used word processor suites such as Microsoft Word or OpenOffice.
These include text customisations like ‘Bold’, ‘Italic’, ‘Underline’, ‘Text align’ and colour. Other options include ‘Insert/edit link’ , ‘Remove link’, and ‘Insert Read More Tag’.

Insert/Edit Link, Remove Link and Insert Read More tag
The ‘Add Media’ button above the Ribbon allows you to upload images and videos into your blog posts.
Writing modes
You can choose between writing your blog posts in ‘Visual’ (selected by default), ‘Text’ or ‘Distraction-free’ writing modes, the latter of which removes the left hand navigation bar and dialogue boxes down the right-hand side.
Choosing ‘Text’ also allows you to enter HTML code directly into the text box, which is unavailable in ‘Visual’ mode.

Other features
Now let’s take a look at the other dialogue boxes that run down the right-hand side of the ‘Add New Post’ screen.
‘Publish’

From this box you can set your blog post live by hitting ‘Publish’, save the post as a draft giving the option to return later, or ‘Preview’ the post to see what it will look like once it is set live.
You can also schedule the post to go live on a specific date and time by clicking on ‘Edit’ next to ‘Publish immediately’.
‘Format’

From here you can change the format of the post you’re uploading, for example if it’s an image or video. However for blog posts you will always want to select ‘Standard’, which is the default setting
‘Categories’

Use this dialogue box to select which category you want the new blog post to fall under. If it doesn’t fit within an existing category, a new one can be created by clicking ‘Add New Category’. From here you can create a new parent category, or a new sub-category.
In the example above, you could create sub-categories of ‘Uncategorized’, ‘WordPress’ or ‘WordPress for Beginners’.
‘Tags’

Adding tags to a web page or blog post was once an important part of SEO, however this is no longer the case, and instead tagging your blogs is only relevant if your website utilises a site search feature.
‘Featured Image’

The featured image of a blog post will typically be shown on the main blog page, next to the post’s title and summary. Some websites will require featured images to be certain dimensions, so bear this in mind when choosing an image to use.
Once you’ve published your blog post you can go back in at any time and edit it by navigating back to the ‘All Posts’ section and clicking on the blog post title.
If you’re a WordPress beginner and you’d like to find out more about using this popular content management system for maintaining your website, download our FREE eBook, The Beginner’s Guide to WordPress.
Our content includes affiliate links. This means that we may receive a commission if you make a purchase through one of the links on our website. This will be at no cost to you and helps to fund the content creation work on our website.