.svg "SpotDevLogoOrange (2)")
Adobe Photoshop is a versatile and complex piece of software that is used to enhance photographs, create digital artwork, design web and mobile apps, 3D artwork, edit videos and so much more. The sheer scale of what Photoshop can accomplish is sometimes daunting to new users… but never fear!
In this post we are going to go over some of the basics, beginning with setting up a new document and an introduction to the tools featured in the main toolbar.
I will be using Photoshop CC, so if you’re using an older version of Photoshop you may find one or two minor inconsistencies as well as a few functions that are not available. If any functions are CC or CS6 exclusive, I will be highlighting them as such.
So let's grab a cup of tea and get started! (Tea is optional)
Creating a new document
Unlike with previous versions, when you first open up Adobe Photoshop CC you will be greeted by a splashscreen featuring many preset documents to choose from, each with a little discription. You will also see to the right of the screen ‘New…’ and ‘Open…’ buttons. Selecting ‘New…’ will bring up a new document dialog box, allowing you to create a document to your own specifications, while choosing ‘Open…’ will allow you to open a preexisting file such as a .psd .jpg .png. As with many other programs you can also go to the top toolbar and select ‘File’ > ‘New’.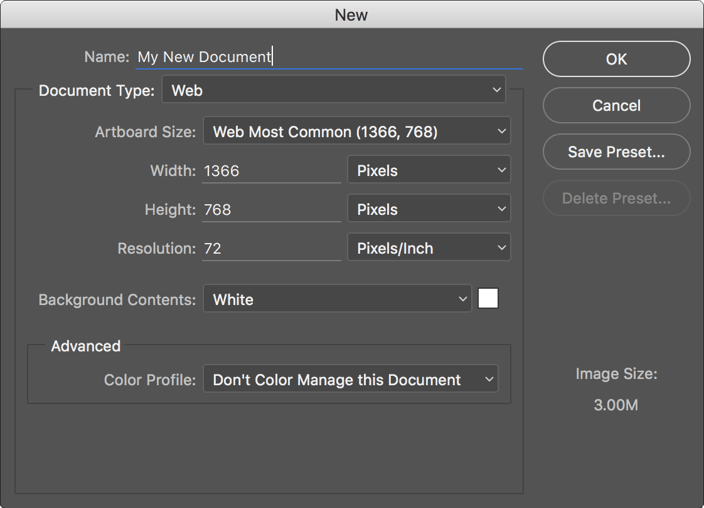
Once you have brought up the new document dialog box you can:
- Name your document;
- Choose which type of document you would like to create (Print, Web or Video);
- Define the dimensions you would like your file to be, width and height (you can also change the type of measurements you would like to use in the drop-down menu);
- Define the resolution (the number of pixels in an image. The higher the resolution, the better the quality of the image. Web tends to be 72dpi while print is 300dpi);
- Choose the colour mode (the main colour modes you will most likely be working in is RGB, which is for screen, or CMYK, which is used for print);
- Choose the background colour (this affects your base layer/background of your document and can be adjusted later).
There are also some ‘Advanced’ options, but you can just ignore these for now.
Once you have inputted all of the desired properties for your document you should be ready to go. Click ‘Ok’ and you will now be presented with your brand new document to start working on!
Getting to know the tools
Once you have created your new document you will see your new blank canvas along with a toolbar to the left of the screen, as well as the ‘Panels’ section to the right. 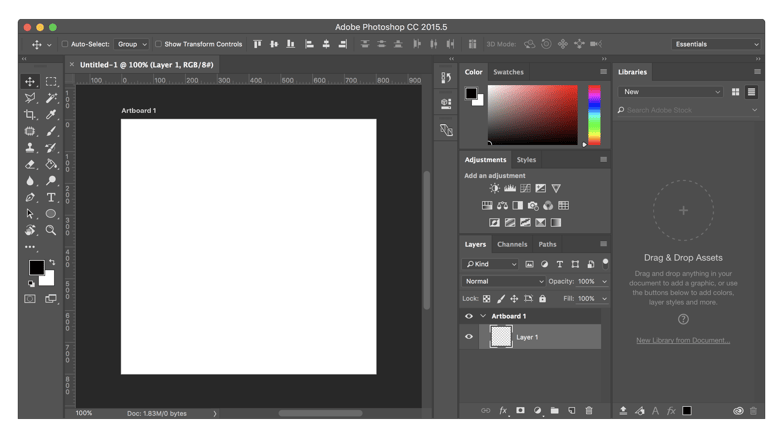 You will also notice a tab with your document name on it, underneath the top toolbar. This is your document tab and works much like you would see in Google. If you have multiple documents open they will stack in this tab area, allowing you to easily switch between them.
The panels to the right of the screen show additional options for your document. They also have the ability to be either docked and nested with all your other panels, or dragged and dropped to wherever you like on your screen.
The toolbar by default will stack in a single column, but if you would prefer you can make them stack in a two column view by clicking the two small arrows at the very top of the bar. 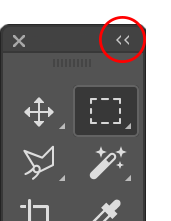
When a tool is selected, a toolbar along the top of the workspace called the ‘Options bar’, will change to show options for that particular tool.
You may notice that some of the tools on your toolbar have little arrows underneath their icons. This is because Adobe have stacked tools on top of each other to save on space. 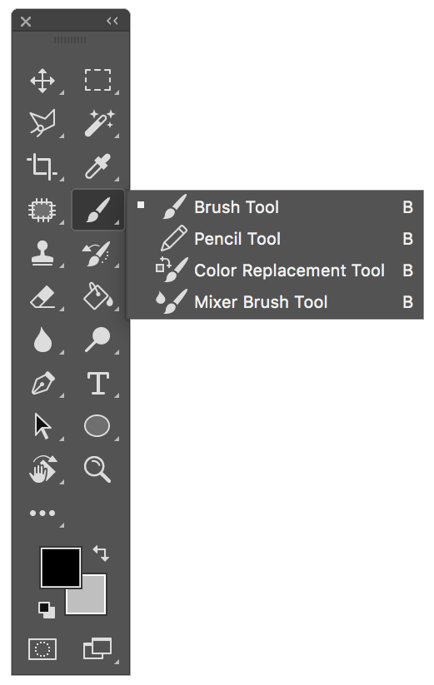
Tools with a small triangle in the lower right corner are nested tools. To reveal a hidden tool, click and wait a second or right click on the icon for the stacked tools to pop up in a menu.
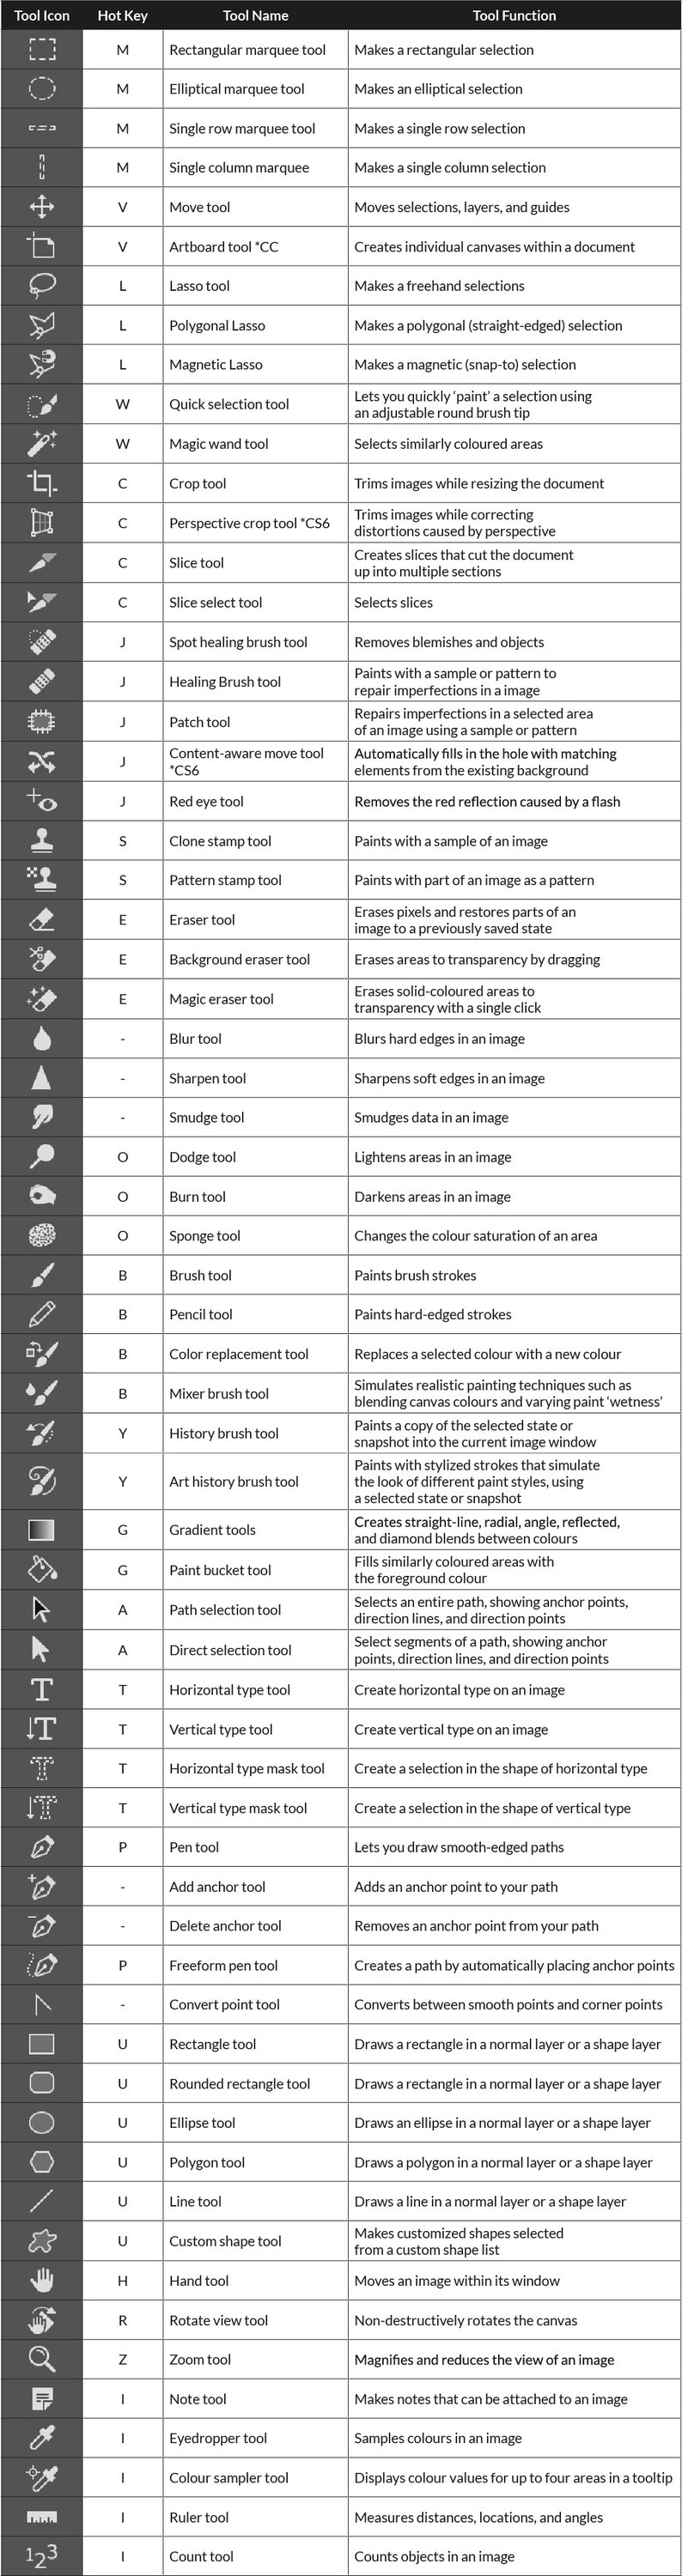
If you are unsure of what a tool is, you can hover over the tool and its name will appear in a little tooltip. You can also use this cheat sheet below to get an idea of all the different tools and their uses, along with their corresponding hot keys. If tools share the same hot key you can keep pressing it, to cycle through the different tools that share that key.
So by this point you should now know a few of the different tools Adobe Photoshop has to offer, as well as a few tips to get you started. Don’t worry if you don’t remember what all the tools do or what all the hotkeys are, you may never need to use all of them and the more you practice, the easier it will all become - honest!
Our content includes affiliate links. This means that we may receive a commission if you make a purchase through one of the links on our website. This will be at no cost to you and helps to fund the content creation work on our website.