.svg "SpotDevLogoOrange (2)")
There is no question that search engine optimisation (SEO) is an essential consideration for organisations of all shapes and sizes.
Ensuring you can be found easily by people searching for things relevant to your products and services is a crucial element of modern lead generation, but it can be daunting for many.
Fortunately, if your website runs on WordPress there is a fantastic plugin that can make things a whole lot easier - Yoast SEO.
Installing the plugin
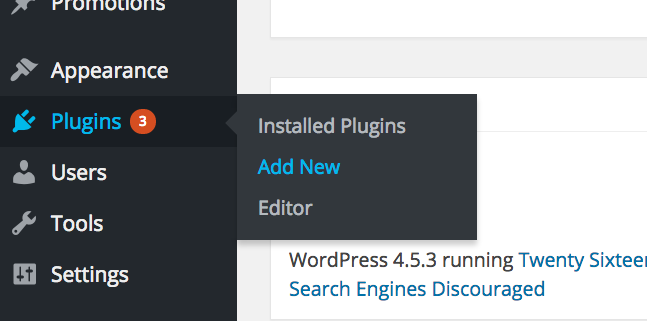
Installing this free-to-use plugin is incredibly simple.First, hover over the ‘Plugins’ button in the left-hand navigation and select ‘Add New’.
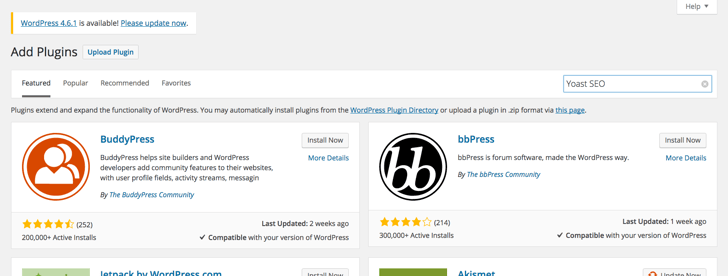
From the ‘Add Plugins’ page, you can now use the search bar at the top of the screen to find Yoast SEO.
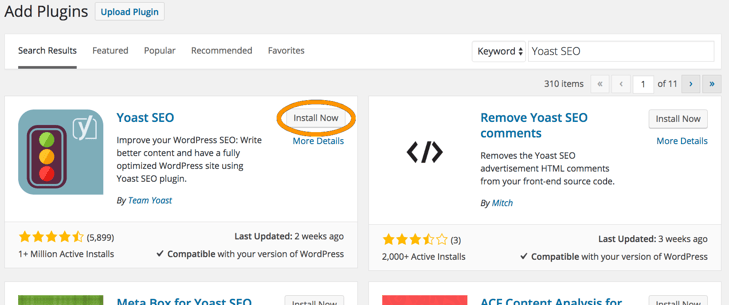
After searching ‘ Yoast SEO’, the plugin we want should be the top (and left) result. Click on ‘Install Now’ to download and install the plugin.
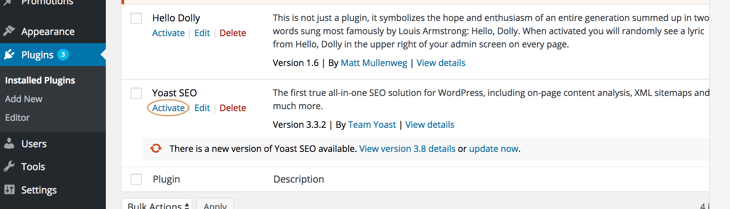
Now, click on ‘Installed Plugins’ which sits below the ‘Plugins’ button within the left-hand navigation bar. This will take you through to where all of your installed plugins are listed - including the newly downloaded Yoast SEO.
Click ‘Activate’ and we’re good to go!
The Yoast SEO Dashboard
Let’s start by checking out the Yoast SEO dashboard.You can navigate to it from any WordPress page by clicking on the Yoast logo in the top nav bar.
From the initial ‘Dashboard’ tab you’ll be presented with two sections, ‘Problems’ and ‘Improvements’.
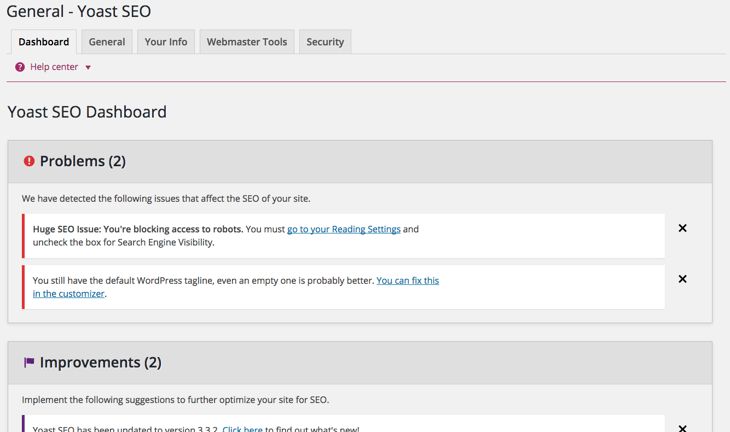
Anything that appears in the ‘Problems’ section you should look to remedy straight away, while the ‘Improvements’ section are suggestions for areas where your SEO could be optimised better. For example, in this instance the suggested improvements for our example WordPress website is to update Yoast SEO to the latest version and connect the plugin to Google Search Console so it’s able to identify crawl errors.
The other tabs are:
- ‘General’ — where you can take a tour to learn more about the plugin, view the most recent changes to Yoast SEO and restore default settings.
- ‘Your Info’ — where you can give the website a name and an alternate name, as well as specify whether the website is for a company or individual.
- ‘Webmaster Tools’ - where you can verify your Google, Bing and/or Yandex Webmaster Tools profiles with your WordPress website.
- ‘Security’ - where you can enable all users to noindex posts or change the canonical URL of a page. It’s disabled by default, and we’d recommending keeping it that way to ensure only administrators can change these settings.
Optimising posts and pages
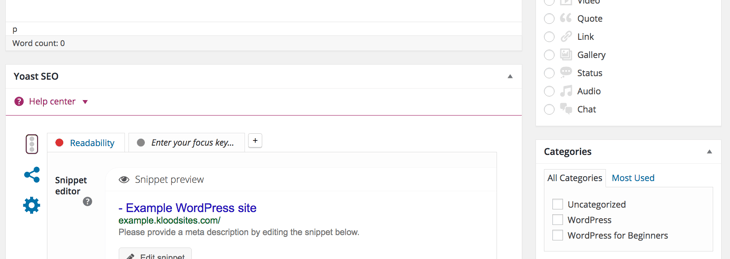
One of the main functions of Yoast SEO is to help you to properly optimise your web pages and blog posts for SEO.When you are adding a new page or blog post, there is a Yoast SEO dialogue box below the main content area.
First, enter your ‘focus keyword’ for the page or post. For example, if you’re a plumbing business and adding a new web page for boiler servicing, ‘boiler servicing’ will be the focus keyword.
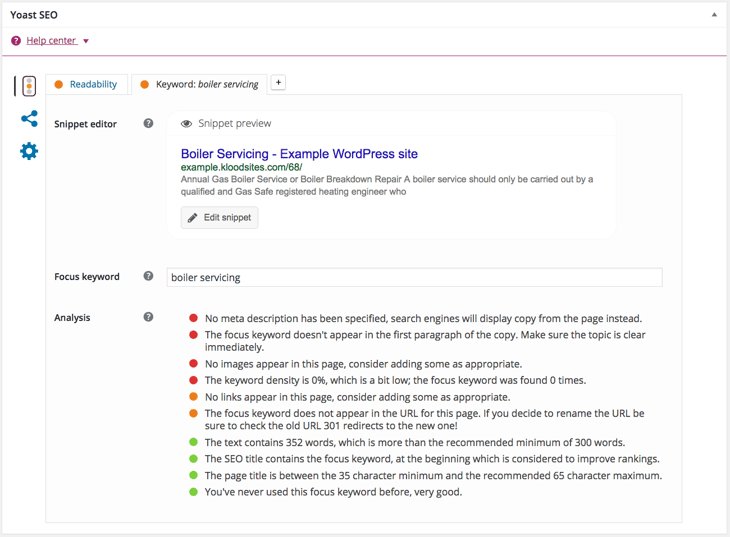
The Yoast SEO plugin will then analyse the content on the page and provide an evaluation based on a traffic-light style system. As you can see from our example above, the problems we need to address as a priority are:
- the lack of meta description;
- the fact our focus keyword doesn’t appear in the first paragraph;
- we don’t have any images; and
- the focus keyword isn’t within the page content.
It’s worth noting that these suggestions are not always valid. For example, Yoast only checks for exact matches of your focus keyword, not including synonyms, while smaller posts may not require images.
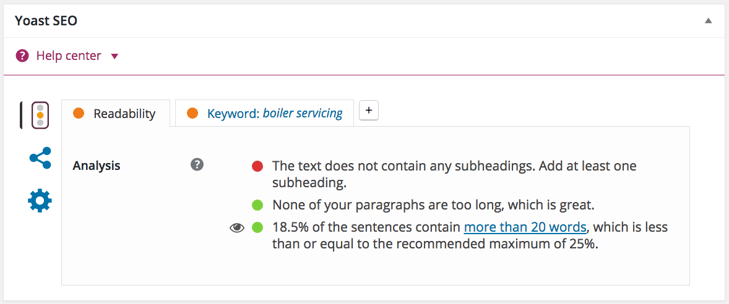
Readability
Ensuring your web pages and blog posts score highly in terms of readability is essential for maximising engagement.The ‘Readability’ tab evaluates your content and makes suggestions as to how it could be improved.
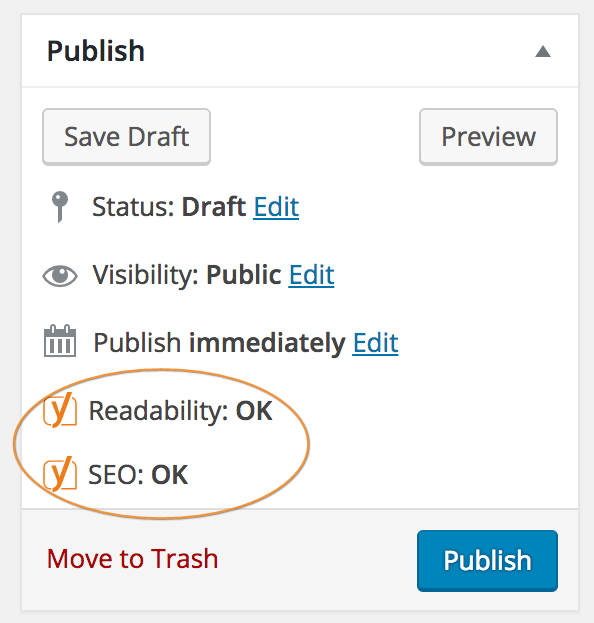
The Yoast SEO plugin also adds a readability rating (as well as an SEO rating) into the ‘Publish’ dialogue box.
Social snippets
The next tab we’ll look at is the ‘Social’ section.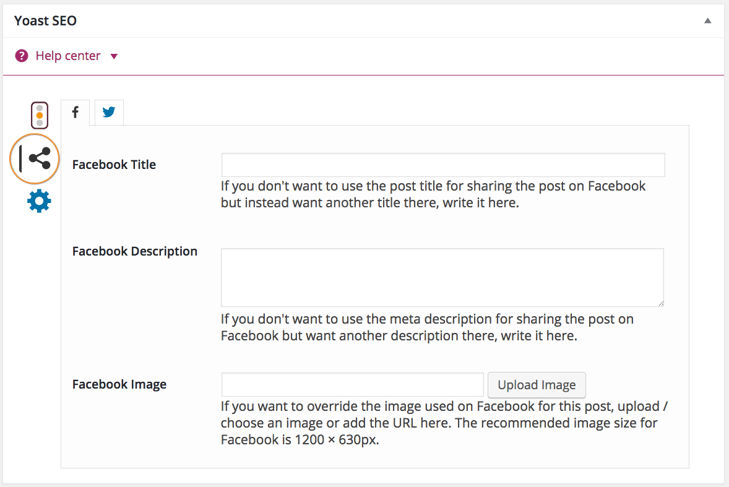
From here we can create custom titles and descriptions for when the content is shared on Facebook or Twitter. You can also specify what image you would like to use.
By default, both of the social media platforms will use the post title and meta description, as well as pull in the featured image if there is one, but this section allows you to overwrite that.
Advanced settings
The final tab is the advanced settings that we touched on previously when discussing the dashboard.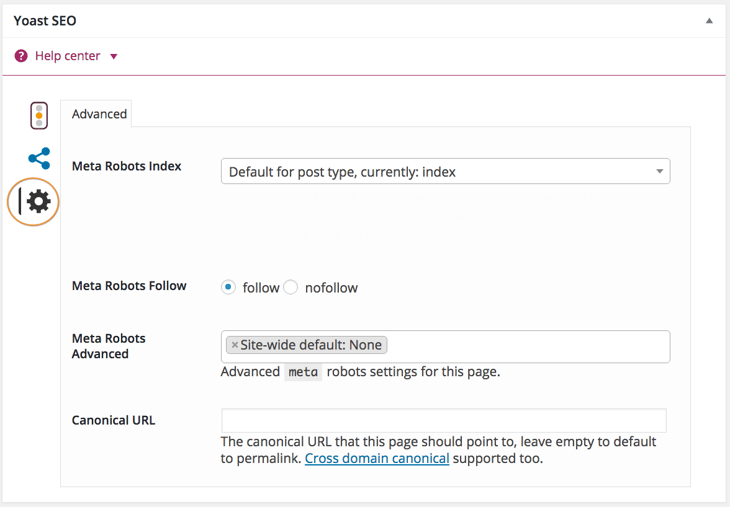
From here you can choose whether you want the page to be indexed or noindexed. By default you should have your pages and posts to always be indexed.
You can also select whether links from this page are followed or nofollowed, make edits to the meta robots settings for the page or change the canonical URL.
Another feature of Yoast SEO are the ‘SEO Settings’, which you can navigate to by hovering over the Yoast logo in the top nav.
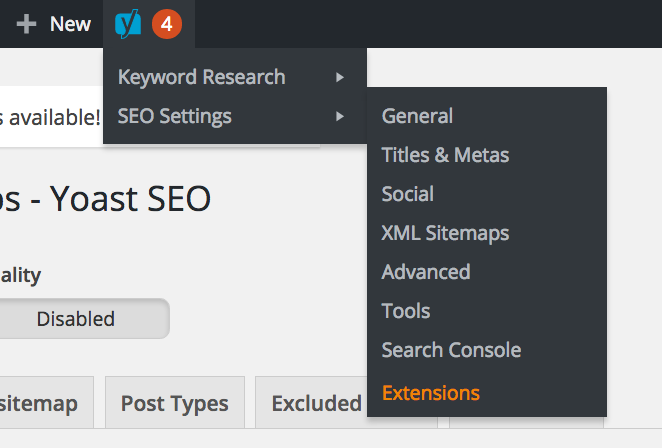
As this guide is intended for beginner’s to Yoast SEO, we will explore these settings in more detail in a future blog post.
Ready to learn more?
Do you want to find out more about optimising blog posts and web pages for SEO?
Download our free eBook, The Beginner’s Guide to Onpage Optimisation.
Our content includes affiliate links. This means that we may receive a commission if you make a purchase through one of the links on our website. This will be at no cost to you and helps to fund the content creation work on our website.