How to Add a New Page on WordPress
How to Add a New Page on WordPress
Get weekly
HubSpot Updates
A couple of weeks ago we went through the process for adding a new blog post to your WordPress website, but blog posts are not the only types of content you’ll need to worry about as a webmaster.
Pages are integral to your website - whether it’s your ‘About’ page, content explaining one of your services or promoting a special offer - and WordPress allows you to easily add them without the help of a web developer.
Check out our blog, ‘How to Add a New Blog Post on WordPress’
The Pages section
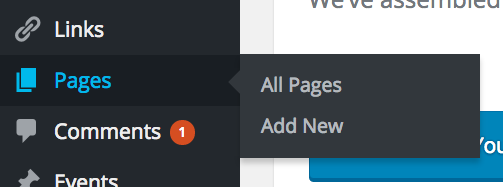
The ‘Pages’ button is located towards the top of the left-hand navigation panel below ‘Dashboard’, ‘Posts’, ‘Media’ and ‘Links’.

If you hover the mouse cursor over ‘Pages’, two options appear: ‘All Pages’ and ‘Add New’.
Viewing your website’s pages
Clicking on ‘All Pages’ (as well as the actual ‘Pages’ button in the left-hand navigation menu itself) will bring up a screen listing all of the pages on your website.
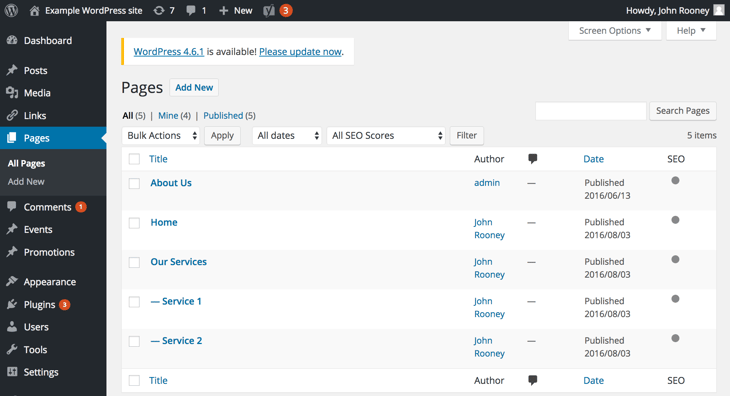
From this screen you can add a new page, edit or delete existing pages, as well as sort the list of pages by date and ‘SEO Score (if a SEO plugin has been installed)’. You can also search your pages using the search bar at the top right of the screen.
Hovering over a particular page brings up a few different options:

Here you can click the ‘Edit’, ‘Quick Edit’, Trash’ or ‘View’ this page. We won’t go into too much detail on these functions here, but they are very simple to use and do exactly what you’d expect them to do.
Adding a new page
You can create a new page by either selecting ‘Add New’ from the options that pop-up after hovering over ‘Pages’ in the left-hand nav or by clicking ‘Add New’ on the ‘All Pages’ screen.
You will then be presented with the following screen:
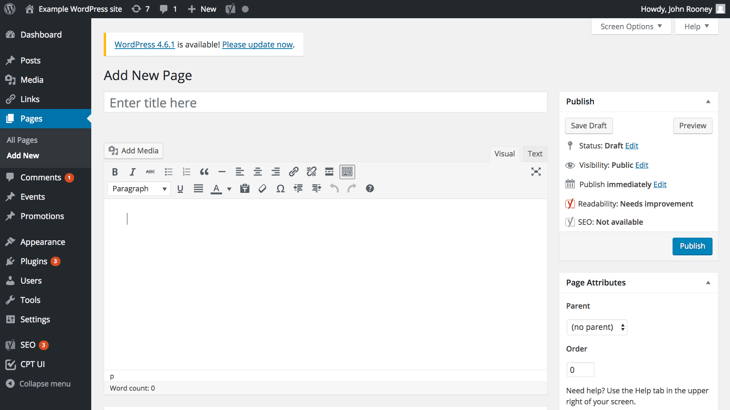
The top text line is for entering the title of the page, which will be used as both the H1 of the page as well as the page title element.
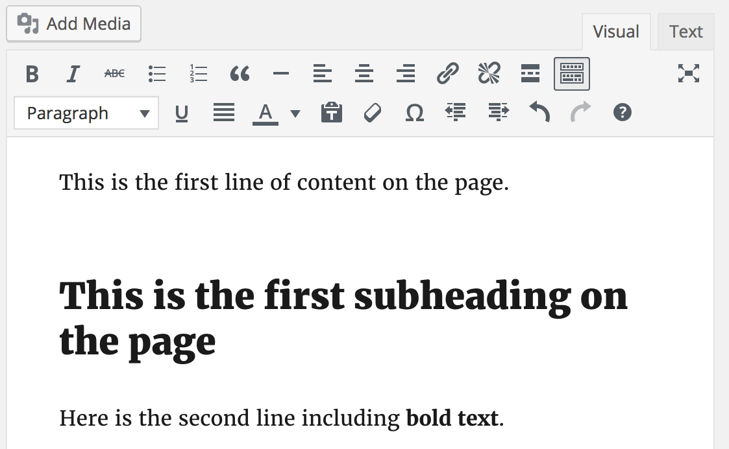
Below that is the text box for the body content of the page. Just above that is the ribbon, which will be familiar to you if you’ve ever used a word processor such as Microsoft Office. This includes text editing options such as ‘Bold’, ‘Italics’, ‘Underline’ and text alignment, as well as some additional options like adding a link, adding a more tag and formatting text as a heading.
Note that when you start to add content onto the page an option to edit the URL (the ‘Permalink’) will appear below the title field.

Change this default URL to one that is logical and mirrors the page title. In this example, we’d change the URL to ‘http://example.SpotDevsites.com/my-new-page’. For long page titles, we’d suggest removing connecting words, such as ‘to’, ‘for’, ‘and’, etc.
Text editor
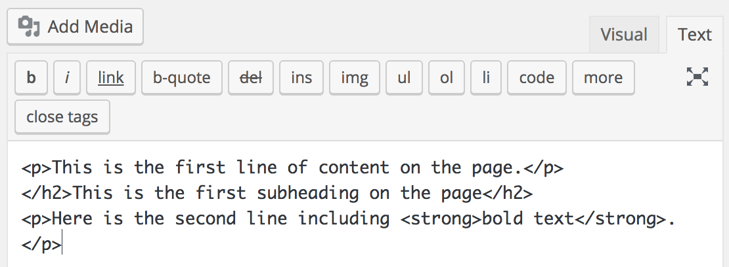
When adding content into the body content box you can choose between doing so in the ‘Visual’ or ‘Text’ editor.
Although the visual editor allows you to format the content, the text editor allows you to enter HTML code directly into the content box.
Page Attributes
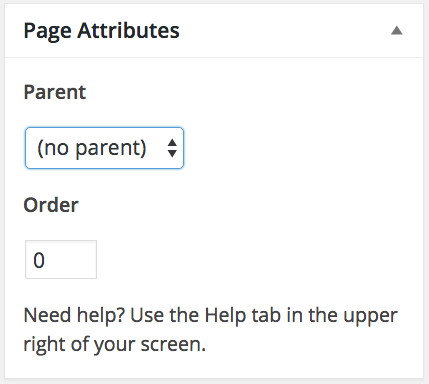
The second dialogue box down the right-hand side of the screen is where you define whether or not this new page is a new ‘parent’ page, or a ‘child’ of another page. For example, a new page titled ‘Automatic Screwdrivers’ might have a parent page ‘DIY Tools’.
The URL for this new ‘Automatic Screwdrivers’ page might then look like:
http://www.abctools.co.uk/diy-tools/automatic-screwdrivers
By default your pages will be ordered alphabetically, but you can change this by numbering them in the ‘Order’ box of this section, with ‘1’ being first.
Featured Image

Below the ‘Page Attributes’ box is where you can set a featured image for the page, though how this appears on the page will depend on the CSS of your website. If you want this to be changed you’ll probably need to speak to your web developer.
Most sites follow a similar pattern, and your web developer may have edited the CSS to have the ‘Featured Image’ display as a suitably sized banner image on the page, along with a thumbnail on the parent page.
Publishing the page
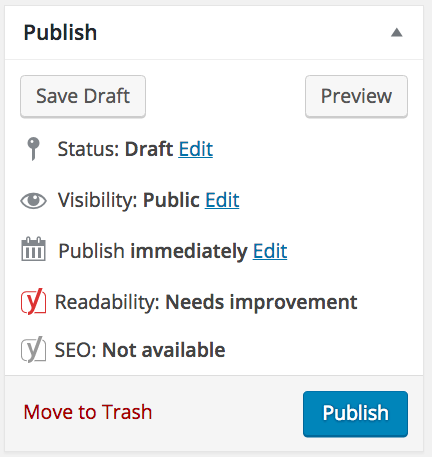
The final element of the add new page screen we’re going to look at is the ‘Publish’ dialogue box at the top right-hand side of the screen.
From here you can save the page as a draft to return to later, preview the page to see how it will look when live, delete the page or set it live. Even after publishing a page, you can return to it at any point 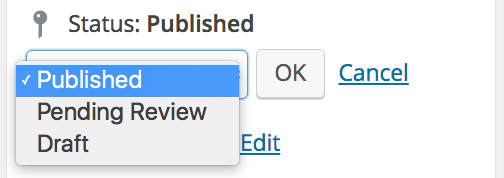
Click ‘Edit’ next to ‘Status: Published’ and select ‘Pending Review’ or ‘Draft’ from the drop down. To confirm the change, click ‘Update’ at the bottom of the ‘Publish’ dialogue box.
Want to learn more about WordPress?
If you’re just getting started with this powerful content management systems and you want to learn more about it, download our Beginner’s Guide to WordPress below, for tips on adding and managing new content, optimising that content for SEO and using widgets.
Our content includes affiliate links. This means that we may receive a commission if you make a purchase through one of the links on our website. This will be at no cost to you and helps to fund the content creation work on our website.